
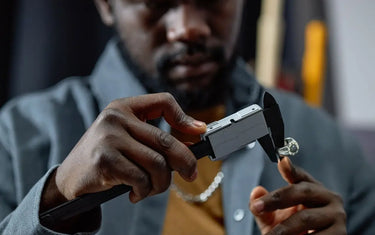
In jewelry making, an error of just 0.1 mm is the difference between a secure gemstone and a lost diamond. Yet, sizing errors rarely come from a faulty digital caliper—they stem from subtle bench habits. Here are 5 common mistakes throwing off your measurements and how to fix them.
Mistake 1: Cranking the Jaws Too Hard

Applying excessive force when sliding the measuring jaws closed is the most frequent handling error among beginners and seasoned artisans alike.
The Problem
When you pinch the external jaws tightly around an object by hand, the mechanical leverage causes jaw deflection—the ground steel blades flex slightly outward at the tips. This elastic deformation makes the display read noticeably smaller than the workpiece actually is.
Beyond skewed numbers, hard clamping causes physical damage:
- It easily crushes or stretches soft, annealed precious metals like 24K pure gold, fine silver wire, or fragile wax carving prototypes.
- It leaves gouges or crushed girdles on soft, organic, or cleavage-sensitive gemstones such as Ethiopian opals, cultured pearls, and natural turquoise.
The Fix
Never squeeze the sliding jaw directly with your thumb and forefinger. Instead, roll the integrated thumb roller forward with steady, moderate speed. Stop the moment you feel the faces make initial contact with the metal—a benchmark known as "light contact pressure."
When sizing fragile spheres, cabochons, or pre-polished components, choose non-marring nylon calipers, swap in brass slip-on covers, or apply a strip of low-tack protective film to the stainless steel faces before checking stock dimensions.
Mistake 2: Zeroing on Bench Dust and Metal Shavings

A jeweler’s bench pin is an environment naturally filled with abrasive particulate, from saw teeth cuttings and silver swarf to carborundum grit and powdered tripoli compound.
The Problem
Digital precision tools read down to 0.01 mm (0.0005 inches). If a stray particle of gold filing or buffing residue measuring just 0.03 mm gets trapped between the faces when you tap the origin button, your baseline reference shifts immediately. From that second forward, every dimension you pull on that project will be systematically undersized by that exact margin.
The Fix
Before hitting the tare button, adopt the Light Gap Test:
- Wipe both ground edges along a clean, lint-free microfiber cloth or across the clean side of your palm to sweep away floating dust.
- Slide the jaws fully shut under gentle roller tension.
- Hold the closed caliper up toward your overhead bench lamp or window.
If you see any uneven slivers of light shining through the seam, open the tool, clear the mating surfaces again, and recheck. Only press the ZERO button once the faces shut dead flush with zero light bleed.
Mistake 3: Tilting the Caliper When Measuring Ring Inner Diameters

Measuring the inside diameter (ID) of a ring blank, round gallery wire, or tubing with the top internal jaws introduces significant geometric error if your approach angle wanders.
The Problem
The internal jaws are ground with narrow contact flats designed to seat inside hollow shapes. If the instrument tilts even slightly away from 90 degrees relative to the band's central axis, you introduce two distinct errors:
- You measure an elliptical chord rather than a true diameter.
- The jaw edge catches the inside chamfer or lip rather than the true center wall.
Both errors register a reading smaller than the actual bore, prompting you to stretch the ring further on the mandrel and leaving the customer with an oversized piece.
The Fix
Insert the upper internal measuring nibs straight down into the center opening of the ring shank, keeping the tool body parallel to the ring’s cross-sectional plane.
With the jaws lightly expanded against the inner wall, gently pivot the tool body through a small lateral arc. Watch the LCD panel carefully and record the highest reading reached during the swing. In geometry, the longest straight line spanning an enclosed circle is always the true center diameter.
Mistake 4: Using Only the Tips of the External Jaws

It is tempting to treat the needle-thin outer points of your caliper like tweezers, reaching into tight settings and checking prong stock with just the top 2 millimeters of the steel blades.
The Problem
Measuring exclusively at the extreme tips magnifies two issues:
- Mechanical strain: The law of the lever dictates that pressure applied at the furthest tip produces maximum torque against the slide beam, exaggerating jaw deflection.
- Premature wear: Scraping sharp points against raw castings, hardened drawplates, or steel ring mandrels rounds off the precision ground edges over time. Once the tips wear down, the jaws lose parallelism, rendering all future sheet-thickness measurements inaccurate.
The Fix
Whenever physical clearance allows, slide your wire, bezel strip, or precious metal sheet as deep into the throat of the jaws as possible. Seat the piece directly against the wide, flat reference ground flats closest to the main stainless steel scale bar. Reserve the extreme tip sections solely for narrow recesses, prong gaps, or complex setting undercuts where clearance is tightly restricted.
Mistake 5: Overlooking Low-Battery Jumps and Workshop Moisture

Modern electronic calipers rely on a high-precision glass scale printed with a capacitive grid. As the sliding head moves, it detects microscopic phase shifts in the electrostatic field to compute distance.
The Problem
Because these capacitive sensors rely on minute electrical signals, workshop contaminants disrupt readings without warning:
- Dim or low-voltage batteries: When a coin cell dips below operating threshold, the microprocessor drops pulses, causing random jumps of 5 mm or freezing mid-stroke.
- Airborne moisture and conductive dust: Microscopic water droplets from an ultrasonic cleaning tank, steam from an extraction nozzle, or conductive gold and copper filings settling on the slider track short-circuit the capacitive grid.
- Chemical acid fumes: Setting your tool adjacent to a warm pickle pot subjects the slider track and internal circuit board to corrosive sodium bisulfate vapors.
The Fix
Treat erratic numerical jumping as an environmental symptom, not an immediate tool failure:
- Discard cheap alkaline button cells in favor of genuine silver-oxide batteries (such as SR44 or 357), which deliver a flat, consistent discharge curve until depleted. Replace the battery the moment the display dims or flickers.
- Clean the glass/copper encoder strip regularly with isopropyl alcohol and a dry cotton swab.
- Store the caliper completely away from soldering stations, pickle stations, and ultrasonic wash sinks.
Quick Bench Checklist
Keep this 30-second start-up routine pinned to your bench wall:
- [ ] Wipe & Inspect: Clean both measuring faces and confirm no light passes through the closed jaws.
- [ ] Zero Check: Close with the thumb wheel and reset the LCD to 0.00 mm.
- [ ] Seat Deep: Position stock near the root of the jaws rather than the delicate tips.
- [ ] Light Touch: Advance with the thumb roller until first resistance; avoid squeezing the frame.
- [ ] Clean Storage: Wipe down the beam and stow the instrument in its foam-lined case at the end of the day.
Upgrade Your Bench for Reliable Precision
Precision measurement is the baseline foundation of clean stone setting, tight joints, and accurate ring sizing. When your measurements are repeatable down to the hundredth of a millimeter, you eliminate costly scrap metal, avoid remounting stones, and cut hours of bench adjustment.
If your current tools are sticking, skipping numbers, or suffering from misaligned jaws, it is time to upgrade your bench setup. Explore the professional line of bench-tested digital calipers and precision goldsmith tools at LuxgoldTools, engineered to deliver the durability, smoothness, and micron-level accuracy your jewelry designs demand.
