
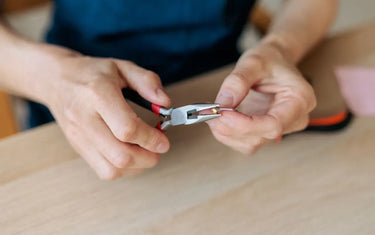
A deformed jump ring or an uneven seam is one of the quickest ways to ruin a polished jewelry design. Beginners often struggle with jump rings turning oval, weakening at the joint, or scratching under pressure.
Opening a jump ring cleanly comes down to a single golden rule: always twist the ends forward and backward—never pull them apart sideways.
I. Essential Tools for Opening Jump Rings

Using the right hand tools protects delicate wire gauges and precious metal platings from accidental marring.
- Standard Workshop Setup: Two pairs of chain nose pliers. Their tapered tips allow pinpoint placement near the seam, while their flat interior surfaces grip without slipping
-
Advanced & Ergonomic Setups:
- One Chain Nose + One Bent Nose Plier: The angled tip of a bent nose plier clears your line of sight, making microscopic links easier to see under bench magnifiers.
- Chain Nose Plier + Jump Ring Opening Ring: A slotted brass thimble worn on the non-dominant thumb accelerates repetitive batch assembly.
- Non-Negotiable Feature Requirements: Always use smooth-jaw pliers. Serrated hardware pliers will bite through gold vermeil, sterling silver, or brass. Look for return springs and cushioned, non-slip handles to minimize hand fatigue during production runs.
II. Step-by-Step Guide to Opening and Closing Jump Rings
Mastering this technique takes only a few seconds once you understand the mechanics of wrist alignment, grip contact, and lateral tension.

Step 1: Precision Grip Positioning
- Orient the Seam: Hold the jump ring in front of your bench light and rotate it so the split (cut seam) sits squarely at the 12 o'clock position facing upward.
- Set the Jaw Depth: Take one pair of chain nose pliers in each hand. Clamp the left half of the ring at the 9 o'clock position and the right half at the 3 o'clock position.
- Minimize Lever Slack: Ensure the flat edges of the plier tips sit directly alongside the seam without touching each other. Gripping as close to the slit as possible maximizes your mechanical leverage and prevents the wire arc from kinking.
- Calibrate Hand Pressure: Apply firm, consistent squeeze pressure—enough to eliminate slip while avoiding crushing soft metals like fine silver or electroplated brass.

Step 2: The Controlled Lateral Twist
- Anchor the Non-Dominant Hand: Lock your non-dominant wrist completely stationary. This hand serves as your stable anchor point to keep the ring level in space.
- Execute the Forward/Backward Motion: Using only your dominant wrist, smoothly push one side forward (away from your body) while gently pulling the opposite side backward (toward your body).
- Manage the Clearance Aperture: Open the gap only wide enough to slide through the wire gauge of your target chain link, charm bail, or clasp tab—typically no more than 1 mm to 2 mm.
- Preserve Internal Temper: Avoid excessive lateral rotation past a 45-degree angle. Over-twisting stretches the outer grain of the metal, creating irreversible work-hardening weak spots that cause the ring to snap later.

Step 3: The "Friction Click" Closure
- Thread the Component: With the ring open, immediately slip on your connector, clasp, or pendant, keeping the pliers in place to maintain total control.
- Reverse the Plane of Motion: Slowly twist the open wire ends back toward the center plane using the exact reverse path of Step 2.
- Apply Slight Inward Over-Travel: As the two cut faces approach each other, apply gentle inward axial pressure so the cut ends lightly scrape past each other by a hairline margin.
- Listen for the Alignment Click: Ease the tension back to center until the cut ends spring into perfect alignment face-to-face. You will feel a slight tactile pop and hear a faint audible click.
- Verify Flush Contact: Run your fingernail across the outer and inner joint. If your nail catches on an edge, the seam is misaligned. Readjust with a micro-twist until the joint is completely seamless and snag-free.
III. Common Mistakes and How to Avoid Them
Even experienced bench jewelers run into distorted findings if their mechanical technique slips.
- Mistake 1: Pulling the ring open sideways (East-West). Expanding the ring's diameter ruins its round shape permanently; it can never be squeezed back into a true circle.
- Mistake 2: Grabbing household serrated pliers. Textured utility jaws leave deep teeth impressions on precious metals that require aggressive sanding and polishing to remove.
- Mistake 3: Gripping too low at the 6 o'clock position. Placing pliers at the base leaves too much unsupported wire above the jaws, causing the ring to twist into a corkscrew rather than opening cleanly along the seam.
- Mistake 4: Over-twisting past the metal’s yield point. Opening a ring more than 45 degrees causes rapid metal fatigue, leading to snapping upon closure.
- Mistake 5: Leaving a hairline gap at the seam. Thin beading wire or fine curb chains will slip right through an incomplete closure. Always verify flush contact under good bench lighting.
IV. Advanced Techniques: Handling Different Wire Gauges
Different wire tempers and thicknesses require targeted adjustments in tool handling:
|
Wire Gauge |
Common Uses |
Recommended Technique |
|
Fine Gauge (22–24 AWG) |
Delicate earrings, micro-beading, tiny drop charms |
Grip using only the tapered tips of precision chain nose pliers. Apply light wrist pressure to prevent crushing soft fine silver or high-karat gold. |
|
Medium Gauge (19–21 AWG) |
Standard necklace clasps, charm bracelets |
Standard two-plier twist at 9 and 3 o'clock. Ideal baseline gauge for practicing the friction "click" closure. |
|
Thick / Hard Gauge (16–18 AWG) |
Heavy pendants, chainmaille, stainless steel, nickel-free brass |
Move the ring deeper into the throat (base) of the chain nose jaws where leverage is highest, or swap one tool for a wide flat-nose plier to prevent slipping. |
Upgrade Your Bench Setup
Precision jewelry assembly starts with professional-grade hand tools. When your pliers provide zero-backlash jaw alignment and an ultra-smooth finish, working with delicate jump rings becomes fast, predictable, and clean.
Equip your studio with professional Chain Nose Pliers from LuxgoldTools—engineered with polished, scratch-free jaws, ergonomic comfort grips, and balanced spring tension to keep your jewelry findings flawless on every turn.
