
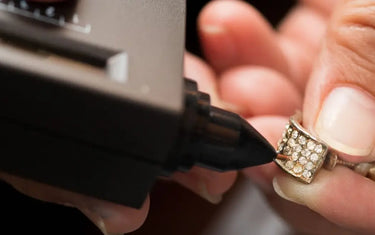
Because moissanite and diamonds share nearly identical thermal inertia, standard thermal testers always mistake moissanite for diamond. Relying on guesswork risks costly misidentifications and disputes at the counter. This quick Standard Operating Procedure (SOP) breaks down the probe techniques, bench prep, and electrical conductivity basics you need for foolproof readings every time.
I. How a Moissanite Tester Works
Most inaccurate readings stem from poor prep work rather than faulty electronics. Establish these bench protocols before placing the probe tip against any facet.

- De-grease the Gemstone Surface: Skin sebum, polishing compound residue, and dust form a dielectric barrier over the facet. This thin film blocks micro-current transfer and produces erratic readings. Clean the stone using an isopropyl alcohol wipe or lint-free microfiber cloth, then let it dry.
- Normalize Temperature: Rapid temperature changes disrupt the micro-thermistor inside the probe. If a ring just came out of an ultrasonic cleaner, a heated wash, or a steam jet, set it aside until it matches ambient room temperature. Do not repeatedly test the exact same spot without pausing; the heated probe transfers thermal energy to the stone, causing baseline drift.
- Verify Battery Output: Microprocessors require a stable voltage rail to interpret micro-amp signals. When 9V or AAA cells drop below optimal output, the logic gate defaults to erratic alerts or fails to trigger Stage 2. Replace disposable batteries regularly or ensure lithium cells show a full charge.
- Secure the Grounding Plate: Reliable electrical testing requires a closed circuit. When gripping your testing pen, keep bare fingers pressed firmly against the conductive metal plate on the rear or side of the housing. Wearing rubber gloves or holding the device by its plastic housing breaks the grounding loop, preventing the instrument from registering electrical flow.
II. Pre-Test Preparation: The 80% That Dictates Accuracy
Operating a moissanite tester requires the muscle memory of a bench jeweler. Minor hand tremors, incorrect probe travel, or glancing contact can trigger false readings. Execute the following protocol to achieve laboratory-grade repeatability on every test.
Step 1: Power Sequencing and Thermal Stabilization

Switch the device on and place it flat on your bench while it initiates its firmware boot sequence and pre-heats the internal thermal resistor.
- Respect the Duty Cycle: Never touch the probe tip to any surface while the status LED is cycling or blinking. The microprocessor is establishing an ambient temperature baseline.
- Confirm Ready State: Wait for the steady green Ready indicator (or steady audio chime). If the warm-up cycle takes longer than 30 seconds, it indicates low battery voltage, which directly impairs probe heating accuracy.
Step 2: Environmental Calibration and Stone-Size Offset

Moissanite testers with manual gain or sensitivity dials require adjustments for ambient airflow and stone thermal mass:
- The Sensitivity Scale: Most analog dials feature settings from 1 to 7 or 8. Small stones under 0.05 ct dissipate heat much faster than larger stones (0.50 ct+), while cold environments (under 18°C / 64°F) pull heat from the probe prematurely.
- Dialing In: Check the ambient temperature chart on the rear housing. For a standard 1-carat stone at room temperature (20°C–25°C), set the sensitivity level to the median factory mark (typically Level 3 or 4). Use the built-in calibration disc (or included test simulant) to verify that the needle or bar graph lands precisely in the baseline zone before touching customer goods.
Step 3: Mechanical Alignment and The "90° Table Rule"

Facet geometry determines whether the electrical circuit closes properly.
- Perpendicular Trajectory: Approach the stone strictly at a true 90° vertical angle directly above the table facet (the flat, central top surface of the gemstone).
- The "Tri-Point Anchor" Hand Posture: Never test stones freehand with your wrist hovering in mid-air. Rest the heel of your dominant hand firmly on the bench block or counter edge. Rest your index finger against the gemstone mount or stone holder to create a three-point mechanical anchor. This locks your hand in place and completely eliminates micro-slips.
- Avoid Facet Junctions: Never set the probe tip on crown facets, kite facets, or the girdle edge. The sharp facet junctions create uneven micro-gaps beneath the flat sensor tip, causing the instrument to read air insulation as diamond or throw an indeterminate reading.
Step 4: Actuation Depth and Tactile Feedback Control

The tip of a commercial moissanite tester houses a spring-loaded microswitch wired to a sensitive thermistor-electrode core.
- Compression Threshold: Lower the tip squarely onto the table facet and apply gentle, linear downward pressure until the retractable probe barrel collapses into the pen collar by approximately 1.0 mm to 1.5 mm (roughly halfway through its total spring travel).
- The Tactile "Click": Stop pressing the exact moment you feel the internal switch click or hear the activation chirp.
- Prevent Sensor Damage: The micro-probe wire inside the needle is extremely fine. Applying excessive vertical force or angling the device while compressed will bend the internal copper core, break the spring suspension, and ruin the instrument's factory calibration.
Step 5: Metal Isolation and Setting Management

Metal mountings act as massive electrical and thermal sinks. If the probe touches gold, platinum, or silver, it sends an electrical surge back to the microprocessor and triggers an immediate false alarm.
- Testing Prong-Set and Pavé Jewelry: In tight four-prong or six-prong heads, the clearance between the prong tips and the table center is minimal. Look through a 5X head loupe or bench magnifier while landing the probe. Keep the needle dead center. If the continuous "Metal Alert" buzzer sounds, lift off immediately, re-orient your angle to clear the prongs, and descend vertically.
- Handling Bezel Mounts: Because bezel rims encase the gemstone perimeter entirely, any slight tilt of the tester barrel will ground against the metal wall. Rest your non-dominant thumb over the bezel edge to act as a physical stop block for the tester nozzle.
- Loose Stone Protocol: Never hold an unmounted stone between your bare fingers during a conductivity test—human skin carries natural capacitance and moisture that corrupts the electrical readout. Secure loose stones in the spring-loaded indent of a dedicated non-conductive testing base, or hold them firmly at the girdle using vinyl-sleeved, non-conductive gemological tweezers.
III. Troubleshooting Reading Anomalies
When an unexpected result occurs, reference this matrix to isolate the issue before assuming the stone is counterfeit.
|
Reading Anomaly |
Root Cause |
Practical Resolution |
|
Instant buzzer sounds upon contact (Metal Alert) |
The probe tip slipped off the table and bridged onto a prong; or static charge is built up on the mounting. |
Re-center the probe vertically on the table facet. Clean the mounting with a grounded cloth to discharge static. |
|
Inconsistent readings on the same stone |
Thermal buildup from rapid repeated tests, or intermittent contact with the ground plate. |
Let the stone cool for 30 seconds. Confirm your fingers are pressed firmly against the metal grounding strip on the pen. |
|
Diamond flags as Moissanite |
Surface oil film, heavy dust, or condensation creating an artificial conductive path. |
Clean the table facet thoroughly with 99% isopropyl alcohol, let it air dry completely, and test again. |
|
Indicator light flickers or tester fails to respond |
The needle tip has accumulated grease, or the battery voltage dropped below the logic threshold. |
Clean the tip using the paper swipe technique outlined below; install a fresh high-drain battery. |
VI. Probe Maintenance and Care
The measuring tip houses a delicate sensor assembly containing a micro-thermistor and spring contacts. Proper bench maintenance preserves its calibration and responsiveness over years of use.
- Shield the Needle Tip: Retract the tip or slide the protective cover over the probe collar as soon as you finish testing. Dropping the unit onto a steel bench block or catching the needle on a bench cloth will bend the core and ruin the instrument's calibration.
- Clear Oxidation with Plain Paper: Do not use abrasive files, emery paper, or wire wheels to clean a sluggish probe. Place a standard sheet of clean, dry white copy paper on a flat surface. Hold the pen at a 45° angle and gently drag the tip across the paper three or four times. The dry wood pulp fibers will wipe away carbon residue, grease, and surface oxidation without stripping the tip plating.
- Prevent Battery Corrosion: If you use the device intermittently at trade shows or off-site buying trips, remove alkaline batteries before storage. Leaking acid destroys the internal PCB traces and spring terminals, permanently bricking the tester.
Summary
Precise gemstone identification rests on clean preparation, correct 90° probe geometry, and an understanding of electrical conductivity. Eliminating oil barriers, maintaining your grounding connection, and working around metal prongs ensures consistent, repeatable readouts on every piece of jewelry that crosses your bench.
For dependable gem identification at the bench or the retail showcase, equip your workstation with a commercial-grade Moissanite Tester from LuxgoldTools. Engineered with responsive micro-probes, fast warm-up circuits, and clear readouts, our gemological testing instruments give jewelers, pawn brokers, and appraisers reliable accuracy for every transaction.
