
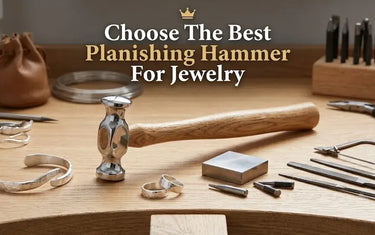
In high-end jewelry making, a flawless surface finish is everything. Don't risk ruining precious metals—or wasting hours sanding out deep dents—simply by using the wrong tool. This no-fluff guide cuts straight to the technical essentials, helping you choose the perfect planishing hammer to elevate your workbench.
I. 4 Key Technical Factors for Choosing a Professional Planishing Hammer
When evaluating a jeweler's hammer designed specifically for planishing, you must look beyond its basic shape. Professional-grade tools are defined by four critical manufacturing standards.

Material & Hardness: Forged High-Carbon Steel
A true planishing hammer must be crafted from forged high-carbon steel. The hardness of the hammerhead must significantly exceed that of the precious metals you work with, such as gold, sterling silver, or platinum. Furthermore, the steel must undergo a precise heat-treatment process. This hardening ensures that the head won't deform, mushroom, or sustain dents during prolonged, high-frequency strikes against a steel bench block or anvil.

Surface Finish: Flawless Mirror Polish
If the hardening is the foundation, the surface finish is the most critical technical metric. A high-quality planishing hammer requires a factory-standard mirror polish. In silversmithing and goldsmithing, metal acts like a mirror; any tiny imperfection, scratch, or speck of rust on your hammer's face will be transferred directly onto the jewelry surface with every strike. A flawless polish minimizes your post-hammering cleanup and sanding time.

Head Configuration: Flat and Domed Dual Faces
Most professional planishing hammers feature a dual-head configuration to maximize utility at the bench. Understanding how to alternate between these faces is key to mastering metal forming:
- Flat Face: Used primarily for leveling sheet metal, flattening wire, and smoothing out prominent bumps left behind by previous forming mallets.
- Domed Face: Featuring a slight curve, this face is used for creating classic, light-catching hammered textures. It is also essential for working seamlessly on curved surfaces, such as the outside of a ring band or a domed pendant, without leaving sharp crescent-shaped edge marks.

Handle Construction: Shock-Absorbing Wood
The handle is your direct connection to the tool and directly impacts operational stability. We highly recommend handles made from Ash or Hickory wood. The natural grain structure of these high-quality woods not only provides an excellent, tactile grip but also effectively absorbs the kinetic shock generated by metal-on-metal impacts. Proper shock absorption is vital for reducing wrist fatigue and preventing long-term strain during intensive bench work.
II. Typical Application Scenarios and Weight Selection Guide
Selecting the right weight is just as critical as the hammer's material. A hammer that is too light will require excessive force, while one that is too heavy can cause you to over-work delicate pieces.
Use this structured guide to match the hammer weight to your specific jewelry applications:
|
Hammer Weight Range |
Applicable Jewelry Types |
Typical Application Scenarios |
|
Lightweight
(100g - 150g) |
Fine jewelry, thin sheet metal, wire work |
Ideal for wire forming, assisting in fine bezel settings, and creating delicate surface textures on small pendants or earrings. |
|
Medium-weight
(150g - 250g) |
Standard rings, earrings, brooches |
The most versatile, all-around size for studio use. Perfect for daily flattening tasks and routine work-hardening of standard gauge metals. |
|
Heavyweight
(250g and above) |
Heavy bracelets, cuffs, large metal utensils |
Used to quickly remove obvious roughing marks, execute large-area hammering shaping, and process thicker precious metal sheet or ingot stock. |
III. Tool Maintenance: Keeping Your Planishing Hammer Flawless
Even the finest high-carbon steel requires proper care to maintain its mirror finish. Treat your planishing hammer with the same respect you give your finishing polishing burs.
The Core Rule: Never use a planishing hammer to strike a rough object, a hardened steel tool (such as a file or a center punch), or rusty metals. It is strictly for striking softer precious metals against a polished anvil or bench block.

- Daily Maintenance: When not in active use, gently wipe the hammerhead with a soft cloth and a light coating of rust-preventive oil. Always store it in a dry environment away from moisture and pickle fumes.
- Refurbishment Steps: If minor scratches do accidentally appear on the hammerhead, follow this concise 3-step refurbishment process to restore it:
-
- Sand: Carefully sand the face using wet/dry metallurgical sandpaper, progressing from coarse to ultra-fine grits (e.g., 400, 800, 1200, up to 2000) to remove the scratch.
- Compound: Apply a high-quality metal polishing compound (like Fabulustre or rouge) to a hard felt polishing wheel.
- Buff: Buff the hammer face on your polishing motor until the ultimate mirror finish is fully restored.
Conclusion
A high-quality planishing hammer is not merely a studio consumable; it is a meticulous investment that accompanies a metalworker throughout their entire career. The right hammer becomes an extension of your arm, allowing you to manipulate metal with precision and confidence.
Regardless of the weight and size you ultimately choose, always prioritize a flawless hammerhead polish and forged steel construction. Never compromise on the core quality of the tool, as inferior materials will inevitably cost you hours of ruined work. We encourage you to review the weight guide above and choose the specification best suited to the scale of jewelry you most frequently fabricate at your workbench.
When you are ready to upgrade your bench with equipment that meets strict industrial and professional standards, explore the premium selection at LuxgoldTools. Our carefully curated collection of planishing hammers delivers the precise balance, flawless mirror polish, and forged durability you need to execute perfect surface finishes on every piece you create.
