
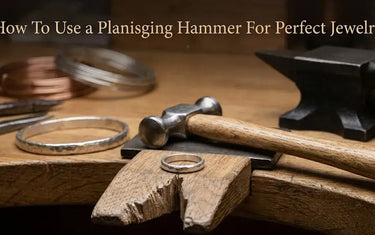
Many jewelry beginners face a frustrating problem: after hours of forging, your final piece is often marred by messy hammer marks and an amateur finish. If your work lacks commercial-grade refinement, the planishing hammer is your secret weapon. This guide will show you how to master this essential tool to instantly erase surface defects, work-harden metal, and elevate your jewelry to professional quality.
I. What is a Planishing Hammer?

A planishing hammer is strictly a finishing and fine-tuning tool, not a heavy fabrication tool. Unlike rough forging hammers, it is designed to deliver the final polish, precision leveling, and structural strength to precious metals.
It features two defining characteristics:
- Highly Polished Mirror Finish: Flawless faces that prevent any scratches from transferring onto your gold or silver.
- Slightly Curved Face: A subtle, radial dome (crown) that ensures the sharp outer edges of the steel head do not dig into your workpiece.
- Crucial Misconception: Never use a planishing hammer to drastically bend thick metal or rough-shape an ingot. Doing so will immediately ruin its pristine, reflective face without shaping the metal efficiently.
II. Pre-work Checks: Anvil Surface and Metal Condition
Before delivering your first strike, you must check your setup. If your underlying support tools are not prepped, even perfect technique cannot save the piece.
- Anvil Mirror-Finish Check: Your backing surface—whether a bench block or a specialized polishing stake—must match the internal curve of your jewelry. Crucially, the anvil face must be as highly polished as your hammer, or its surface blemishes will transfer perfectly to the back of your jewelry.
- Metal Annealing Check: Trying to planish work-hardened metal will cause uneven dents or cracks. Ensure your workpiece has been properly annealed (heated and quenched) to a soft, ductile state so it can smooth out evenly.
III. Core Practical Guide: 4 Key Techniques for Perfect Planishing
Mastering the planishing hammer is a dance of rhythm, precise body mechanics, and metal physics. It is not about raw power; it is about absolute accuracy.
Here is how to execute the 4 vital techniques on your bench:

1. Wrist & Grip Technique: Maximizing Mechanical Leverage
Your grip and hand movement dictate the tool's control. A stiff arm dampens the hammer's bounce, causing double-strikes and irregular dents.
- Handle Position: Hold the wooden handle lightly near the bottom third to maximize natural weight and leverage. Never choke up near the hammer head.
- Grip Tension: Maintain a loose, relaxed hand. Do not squeeze the wood with a stiff, white-knuckle fist.
- Wrist Motion: Keep your shoulder and upper arm relatively still. Rely entirely on wrist elasticity to create a fluid, pumping stroke.
- The Rebound: Treat your wrist as a crisp hinge. Let the steel head swing down under its own momentum and rebound naturally off the metal immediately after impact.

2. Alignment Technique: Achieving the Perfect 90° Vertical Strike
To get a perfectly uniform finish, the highest point of the crowned hammer face must hit your metal at a dead-center perpendicular angle relative to the anvil surface.
- Visual Focus: Lock your eyes onto the exact point of contact where the steel meets the jewelry.
- The Tilted Danger: If your wrist tilts even a fraction of a degree, the sharp perimeter edge of the hammer head will slam into the metal first.
- The Surface Consequence: This off-angle strike cuts deep, crescent-shaped gouges ("fish scales" or "moon marks") into your gold or silver. These defects drastically thin the metal and require hours of aggressive sanding or filing to remove.
- The Correction Practice: Deliver slow, deliberate strokes on a scrap copper sheet until your muscle memory consistently delivers flat, balanced impacts.

3. Pathing Technique: Executing the Overlapping Pattern Grid
Never swing wildly or haphazardly across the metal. Professional planishing follows a highly disciplined, geometric path to blend individual marks into a single plane.
- The Overlap Rule: Each strike must overlap the previous hammer mark by one-third to one-half of its total footprint.
- The Driving Direction: Move across the workpiece meticulously from the inside out, or follow tight, concentric rings depending on the jewelry's shape.
- The Process Analogy: Think of it like laying down interlocking floor tiles or rows of brickwork, leaving no gaps behind.
- The Surface Result: By overlapping the subtle domes of each strike, you gradually flatten the high boundaries between them, merging hundreds of tiny impacts into a singular, seamless plane.

4. Audio-Monitoring Technique: Listening to the Work-Hardening Pitch
A master bench jeweler uses their ears just as much as their eyes to gauge the internal molecular state of the material.
- The Annealed Pitch (Start): When striking freshly annealed, soft precious metal, the hammer yields a low, dull, heavy thud.
- The Compressing Pitch (Progress): As your overlapping grid compresses the crystalline structure, the metal work-hardens and gains structural rigidity.
- The Acoustic Shift: The sound noticeably shifts from that dull thud to a crisp, ringing, metallic tone.
- The Stopping Action: When you hear that clear, bell-like ring, the metal has achieved optimum strength. Stop hammering immediately.
- The Overworking Risk: Continuing past this acoustic warning will over-work-harden the piece, causing the grain structure to fracture, leaving you with split edges and ruined jewelry.
IV. Common Errors, Causes, and Solutions
Even with careful focus, mastering your swing takes time. Use this quick bench-side troubleshooting table to identify and correct surface flaws instantly:
|
Symptom |
Root Cause |
Actionable Solution |
|
Deep crescent-shaped dents appear on the surface. |
The hammer is tilted at an angle; the sharp perimeter edge strikes the metal first. |
Slow down your rhythm. Practice your wrist control on a scrap piece of copper to ensure a true vertical strike. |
|
Fine scratches appear across the planished zone. |
Dust, hard metal filings, or microscopic scratches exist on the hammer face or the anvil stake. |
Wipe both faces down with a clean microfiber cloth before each use. Periodically re-polish your tool heads. |
|
Edges of the jewelry crack or break apart during striking. |
The metal has become over-work-hardened and brittle from too many consecutive strikes. |
Stop hammering immediately. Take the piece to your soldering station and anneal it to restore ductility before continuing. |
|
Metal becomes excessively thin or severely warped. |
You are using excessive force or concentrating too many blows in a single spot. |
Reduce your striking power. Rely on the natural weight of the tool and maintain a steady, rolling movement across the sheet. |
V. Maintaining the Mirror Finish on the Planishing Hammer
Your planishing hammer is a precision instrument, not a utility shop tool. To keep producing flawless jewelry, its reflective finish must be protected at all costs.
- The Protection Principle: Never use a mirror-finish planishing hammer to strike steel nails, binding wire, hard setting tools, or rough casting trees. It should only ever come into contact with polished anvil surfaces and soft precious metals (like gold, silver, copper, and brass).
- The Periodic Polishing Process: If your hammer develops fine lines or loses its luster, it needs immediate bench maintenance. Sand out minor surface scratches by rubbing in a single direction using ultra-fine sandpaper (2000 grit or higher). Once uniform, take the head to a buffing wheel. Charge the wheel with a premium polishing compound, such as Dialux Green or White, and buff the steel until it regains a flawless, mirror-like finish.
- Rust Prevention & Storage: Steel is vulnerable to moisture from humidity and sweat. After every bench session, wipe the tool face completely clean. Apply a microscopic layer of anti-rust oil or light mineral oil, and wrap the hammer head in a soft cloth or protective pouch before storing it away in your tool drawer.
Conclusion
There are no shortcuts to achieving a flawless planished finish. It is a true test of endurance—a rhythmic dialogue between your wrist’s muscle memory, the weight of the steel, and the resistance of the precious metal.
If you want to see your finishing quality improve instantly, grab a simple practice piece of brass or sterling silver sheet and start honing your overlapping pattern technique today.
Of course, professional results require professional-grade equipment. A sub-par tool with poor balance or a poorly tempered head will only make your learning curve steeper. Elevate your jewelry bench setup by exploring the collection of high-precision metalsmithing tools at LuxgoldTools, where you can find the perfect mirror-finished planishing hammer designed to last a lifetime.
