
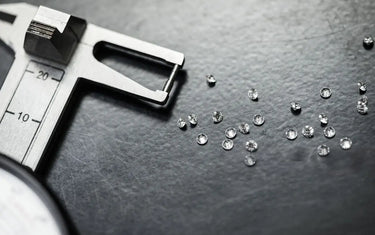
Measuring mounted gemstones demands balancing micrometric precision against real risk: one slip of a hardened steel gauge probe can chip delicate facets, crush a culet, or gouge polished precious metal. Mastering non-destructive probing techniques guarantees pin-point dimensional accuracy and trustworthy carat estimations—without scarring the setting or ruining valuable jewelry.
I. General Preparation and Calibration Before Measurement

Accurate non-destructive appraisal begins at the setup stage. Preparing your measuring instrument properly prevents cumulative measurement drift and eliminates mechanical interference before bringing tool steel near a client's jewelry.
1. Selecting and Matching Probe Attachments
Most standard gem gauges feature flat-faced anvils or short conical tips suitable for unmounted gemstones. These stock tips become liabilities when measuring stones held in deep basket heads, high peg settings, or cathedral shanks.
- Standard Anvils: Best reserved for loose inventory or very low-profile, open wire settings where metalwork does not obstruct direct access to opposite sides of the girdle.
- High-Cap (Extended) Attachments: Essential for mounted jewelry. These extended, slender cylindrical pins clear tall prongs and reach down into under-galleries without pressing the gauge chassis against decorative metal filigree.
Bench Tip: Always select the narrowest high-cap extension capable of reaching the stone's base, ensuring the gauge body stays clear of the ring's design features throughout the measurement process. Professional units like the Presidium Gem Computer Gauge include specialized high-setting attachments directly in the kit.
2. Zero Calibration Procedures
Any switch between standard jaws and specialized extension pins alters the gauge's base focal length. Failing to re-zero creates systematic calibration errors that undermine subsequent calculations.
- Clean the Contact Surfaces: Inspect both probe tips under a 10x triplet loupe. Wipe away bench dust, diamond polishing compound residue, or metallic filings using a lint-free microfiber cloth. Debris as thin as 0.05 mm will distort stone weight calculations.
-
Engage the Calibration: Bring the upper and lower contact anvils together using smooth, even sliding tension.
- For Mechanical Dial Gauges: Loosen the knurled bezel lock, rotate the outer bezel rim until the "0" mark aligns with the primary pointer, and retighten the set screw.
- For Digital Electronic Gauges: Hold the tips completely closed with natural spring pressure and depress the dedicated ZERO / CAL button until the LCD displays 0.00 mm.
- Verify Slider Travel: Slide the jaw carriage back and forth across its track. The mechanical movement must glide smoothly without hitching, gritty resistance, or erratic jumping.
II. Standard Measurement Techniques for Mounted Gemstones
Working around structural metal requires deliberate, step-by-step handling. This safety-first standard operating procedure isolates the mineral edges while keeping the tool steady.
1. Measuring Girdle Diameter, Length, and Width

Never clamp the gauge jaws across opposing prongs. Metal settings add 0.30 mm to 0.80 mm per side, which drastically distorts calculated stone weights.
- Identify Girdle Windows: Examine the setting to locate open spaces between prongs where the girdle edge is completely exposed to air.
- Maintain Parallel Alignment: Align the measurement axis strictly parallel to the flat plane of the stone's table facet. Never tilt the calipers diagonally across crown angles; angled tool steel slips off facet ridges and scratches adjacent facets.
- The "Light-Touch" Rule: Advance the sliding thumb carriage slowly. Stop advancing the slider the instant the steel probe tip touches the girdle perimeter. Rely exclusively on the gauge’s internal spring tension. Never pinch or squeeze the carriage with finger force, as excess pressure can easily cause micro-cleaving along fragile edges.
2. Measuring Total Depth

Depth measurement requires accessing the top and bottom of the gemstone simultaneously, demanding heightened control to avoid crushing the culet.
- Centering on the Table: Place the broad, flat upper anvil squarely on the center of the table facet. Keep clear of star facet junctions and bezel edges, where an unstable anvil could slip off the crown.
- Vertical Probing from Below: Feed the slender lower extension probe straight upward through the center of the ring's open gallery or base ring opening. Move slowly until the flat or recessed cup tip gently contacts the culet.
- Handling Closed-Back Settings: If the piece features a solid-back plate, flush back, or closed vintage bezel setting, never force probe tips into tiny sweat holes or drill vents. Forcing tools here risks bending the metal, cracking the stone, or breaking the gauge tip. Instead, record the diameter and mathematically estimate the depth percentage using crown angle observations and table-width ratios under a gemological microscope.
III. Techniques for Common Setting Styles

Different setting types present unique physical challenges. Adapting your technique to the specific mounting style protects stone integrity and ensures data accuracy.
1. Traditional Prong Settings
Prong settings offer the easiest physical access, yet slight alignment issues can still skew results. Prongs often push or tilt slightly during setting, creating uneven profiles. Take at least two diagonal measurements across opposing girdle openings (for example, northwest to southeast, followed by northeast to southwest). Average the two readings to smooth out localized mounting distortion and get a reliable base diameter.
2. Bezel and Semi-Bezel Mounts
Full bezel collars wrap precious metal around the entire girdle perimeter, eliminating direct tool-to-gem contact points.
- Measure the total outside diameter across the top edge of the metal bezel wall.
- Inspect the rim under a loupe and measure the visible metal wall thickness using your gauge’s knife-edge calipers.
- Deduct the metal thickness of both sides from your overall measurement. In standard gold and platinum jewelry, this deduction usually ranges between 0.40 mm and 0.60 mm per side (a total deduction of 0.80 mm to 1.20 mm), depending on whether the mounting is hand-fabricated or cast.
3. Pavé and Micro-Prong Settings
Settings with shared beads and micro-prongs require extra care. These tiny metal beads secure delicate accent stones under minimal tension.
Never pry gauge tips into the narrow gaps between pavé-set stones. Lateral pressure from a steel probe can push micro-beads aside, causing smaller stones to loosen or pop out of their seats. Work strictly with ultra-fine, needle-nose probe attachments, holding the tool steady under high bench illumination to avoid touching delicate metal prongs.
IV. Safety Precautions for Fragile Gemstone Materials
Not every gem withstands direct metal contact. Knowing the mechanical limits of specific gem species prevents catastrophic damage during routine appraisal work.
| Gemstone Species | Primary Physical Vulnerability | Recommended Measurement Protocol |
|---|---|---|
| Natural Emerald | High internal fracturing, low toughness, brittle borders | Use feather-light contact; avoid tension on corners; consider optical non-contact reticles. |
| Tanzanite | Perfect basal cleavage; highly prone to thermal and mechanical shock | Avoid any point-pressure on edges; measure girdles only at wide, low-stress intervals. |
| Opal | Low Mohs hardness (5.5–6.5), soft amorphous silica structure | Never touch with pointed steel probes; measure using nylon-tipped attachments or optical micrometers. |
| Natural Pearl | Extremely soft nacre layers (Mohs 2.5–4.5); easily grooved | Prohibit direct steel caliper contact; utilize non-marring brass gauges or optical profile projectors. |
Preventing Mechanical Snapback
The most common way stones chip on the bench is through operator distraction during instrument retraction. When you finish taking a reading, use your thumb to smoothly guide the spring-loaded sliding carriage back to its closed position. Never let your finger slip off the slide release. Allowing the spring-loaded jaw to snap shut uncontrolled sends the hardened steel probe crashing directly into the stone's facet edges, which can easily shatter a culet or split a fragile emerald.
V. Converting Measured Data to Carat Weight
Once you have recorded precise millimeter dimensions, convert those physical measurements into estimated carat weight using standard gemological formulas.
1. Girdle Thickness Correction
Mounted stones conceal the true thickness of their girdle under prongs and bezel rims. Standard weight-estimation formulas assume a thin-to-medium girdle profile. If a stone features a thick, faceted, or unpolished girdle, its actual weight will be significantly higher than base calculations suggest.
- Slightly Thick Girdle: Add +1% to +2% to the calculated carat weight.
- Thick to Very Thick Girdle: Add +3% to +4% to the final calculation.
- Extremely Thick Girdle (older native cuts): Add +5% or more to ensure realistic appraisal values.
2. Standardized Calculation Framework
Use these accepted volumetric formulas to calculate estimated carat weights:
Weight (ct) = Length × Width × Depth × Shape Factor × Specific Gravity Adjustment
- Round Brilliant Cut (Diamond): Weight (ct) = Average Diameter² × Total Depth × 0.0061
- Oval Brilliant Cut: Weight (ct) = Length × Width × Depth × 0.0062
- Emerald Cut: Weight (ct) = Length × Width × Depth × 0.0092 (for 1.50:1 L/W ratio)
Manual math introduces risk and transcription delays. To bypass manual calculations entirely, smart instruments like the Presidium Gem Computer Gauge calculate estimated carat weight automatically across 9 cut shapes and 74 gem species with direct USB export.
Presidium Gem Computer Gauge
Resolution: 0.01 mm | Direct Carat Conversion
Mounted Jewelry Kit: Includes High-Setting Prong Attachments
Eliminates manual math. Automatically calculates carat weight for 9 fancy cuts and 74 gem species directly through prong settings.
🟢 In Stock • Genuine Presidium • Ready to Ship
🛒 Check Price & Details (Computer Gauge) →Presidium Gemstone Dial Gauge
Mechanism: 100% Mechanical Rack & Pinion
High-Clearance: Needle Probe for Open Prongs & Filigree
Zero electronic sensor drift. Direct millimeter, carat, and US ring size reading on a high-contrast analog dial face.
🟢 In Stock • Industry Benchmark • Fast Dispatch
🛒 Check Price & Details (Dial Gauge) →Safe Precision for Every Mounted Stone
Mastering gem gauges on mounted stones requires a balanced blend of patience, proper tool calibration, and a clear understanding of setting mechanics. By selecting specialized extended anvils, locating clear girdle windows, applying a gentle touch, and adjusting for hidden girdle thickness, appraisers and jewelers can reliably capture precise dimensions without risking costly damage to their clients' jewelry.
Equipping your workbench with reliable, high-precision measurement tools makes safe stone appraisal routine. Explore the complete collection of professional analog and digital Gem Gauges at LuxgoldTools to upgrade your jewelry studio with the precision instruments your craft deserves.
