
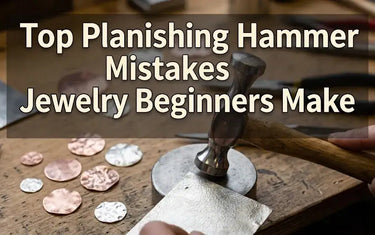
Excited to use your new planishing hammer, only to end up with dented, ruined metal? You're not alone—it's one of the most misunderstood tools on the jeweler's bench. Let's break down the top beginner mistakes and how to fix them, so you can stop wasting expensive materials and start achieving a flawless, professional finish.

Mistake 1: Confusing Planishing Hammers with Mallets
Many beginners group all striking tools together, failing to understand the strict professional distinctions between them. The most critical error is reaching for a planishing hammer when the task actually requires a mallet.
In professional metalworking, Hammers and Mallets are entirely different categories of tools:
- The Mallet (Wood, Rubber, or Rawhide): Used strictly to shape, bend, or persuade metal against a mandrel or dapping block without leaving any marks or thinning the material.
- The Planishing Hammer (Metal-faced): Designed to stretch the metal, work-harden the surface, smooth out earlier forging marks, or apply a specific hammered texture.
If you strike a flat piece of silver with a steel planishing hammer just to flatten it, you will stretch the metal and alter its structure.
How to fix it: Organize your workbench strictly by tool function. During the initial forming and shaping phases, force yourself to use a mallet. Only switch to your planishing hammer when you are ready for surface finishing, hardening, or intentional texturing.

Mistake 2: Striking with the Wrong Angle and Force
Nothing gives away a beginner's work faster than a piece of metal covered in sharp, crescent-shaped indentations—commonly known as "half-moon marks."
These deep gouges occur because the edge of the hammer face is striking the metal rather than the flat, polished center. This is usually the result of a stiff wrist and uneven force. Beginners tend to lock their arms and hammer erratically, leaving gaps between their strikes.
How to fix it: Proper hammering is about rhythm and ergonomics, not brute strength. Power your stroke from your elbow, allowing your wrist to remain relaxed and fluid. Let the weight of the hammer do the work. As you strike, intentionally overlap each blow by 50% of the previous one. This overlapping technique blends the strikes together, resulting in a uniform, mirror-like finish that resembles the gentle ripples on the surface of water.

Mistake 3: Neglecting Hammer Face Maintenance
The true soul of a planishing hammer lies in its flawless, mirror-like face. Unfortunately, it is common to see beginners tossing their prized hammers into a drawer alongside steel center punches, files, and saw frames.
Steel-on-steel contact will quickly scratch, ding, or rust the hammer's face. Because metal forming is essentially a transfer process, every single imperfection on your hammer will be permanently stamped into your precious metal. You cannot achieve a smooth finish with a scarred tool.
How to fix it: Treat your planishing hammer like a precision instrument. Store it in a dedicated leather sheath or a separate tool rack. If the face does get scratched, you must restore it before using it again. Sand the face using fine-grit automotive sandpaper (starting around 1000 grit and working up to 2000 grit), then load a buffing wheel with a high-quality polishing compound and buff until the mirror finish is completely restored.

Mistake 4: Forgetting to Anneal the Metal
A planishing hammer fundamentally changes the crystalline structure of the metal you are working with. With every strike, the metal compresses and undergoes work-hardening. Beginners, eager to see their final design come to life, often ignore the signs of work-hardening and continue to hammer away at rigid metal.
Continuing to strike work-hardened metal will lead to micro-fractures, warped designs, and eventually, a devastating crack right down the middle of your piece.
How to fix it: You must anneal your metal periodically. Learn to "listen" and "feel" the material. As silver or gold hardens, the hammer will bounce back more aggressively, and the sound of the strike will raise to a higher, sharper pitch. When you notice this change, stop immediately. Use a reliable jeweler's torch, such as an ORCA torch, to heat the metal to its proper annealing temperature. This allows the crystalline structure to relax, restoring the metal's malleability before you resume hammering.

Mistake 5: Working on an Improper Anvil or Bench Block
It is easy to develop tunnel vision and focus entirely on the hammer in your right hand, completely forgetting about what is happening underneath the metal.
If your steel bench block or anvil is pitted, rusted, or unstable, the underside of your jewelry piece will absorb all of those flaws. An uneven base not only scratches the back of your work but also compromises the quality and efficiency of the hammering on the top surface, as the energy is lost to vibration.
How to fix it: Your bench block must be maintained with the exact same care as your planishing hammer face. Ensure it is perfectly smooth and polished. Never hammer directly on a hard wooden table; instead, place a leather sandbag or a thick rubber damping pad underneath your steel block to absorb excess vibration and stabilize your work.
Pro Tip for Block Maintenance: Just like your hammer, your steel bench block needs regular upkeep. We recommend using 3M Scotch-Brite discs or abrasive pads to routinely buff away surface oxidation, moisture spots, or light scratches from your block. A pristine bench block guarantees that the back of your jewelry piece remains as flawless as the hammered front.
Frequently Asked Questions (FAQ)
What is the difference between a planishing hammer and a chasing hammer?
A planishing hammer features slightly domed or flat, highly polished faces designed to stretch and smooth metal surfaces. A chasing hammer is specifically balanced with a large, flat face for striking chasing tools (punches) and a smaller round face for riveting, not for striking the sheet metal directly.
How do I know when to stop planishing?
You should stop planishing when the metal surface achieves a uniform, overlapping texture or a smooth, mirror-like finish, and before the metal becomes too brittle from work-hardening. Always rely on sound and hammer bounce to gauge when it is time to anneal.
Can I use a planishing hammer on all types of jewelry metals?
Yes, planishing hammers can be used on most precious and semi-precious metals, including gold, silver, copper, and brass. However, harder metals will require more frequent annealing sessions to prevent cracking.
Elevate Your Craft with the Right Tools
Mastering the planishing hammer is a rite of passage for any jewelry maker. By maintaining a strict organization of your tools, practicing relaxed and overlapping strikes, keeping your hammer face polished, annealing your metal properly, and working on a stable bench block, you will save yourself hours of frustration and unnecessary material costs.
Great technique, however, requires tools that can keep up with your growing skills. When you are ready to invest in professional-grade equipment that delivers flawless, repeatable results, explore the precision metalworking collection at LuxgoldTools. From perfectly balanced planishing hammers to industrial-standard bench blocks, LuxgoldTools provides the uncompromising quality your craftsmanship deserves.
